Making Wire Flowers that Spark Joy
If you've ever wished you could preserve the beauty of a fresh bouquet, wire flowers offer a creative solution that lasts forever. This surprisingly simple craft is a mindful and satisfying way to transform a simple spool of metal into a delicate, everlasting bloom. Discover how to create a beautiful, no-wilt floral masterpiece that captures the magic of a real flower.
9/13/20256 min read

Let's face it, we all have those moments when we need a creative outlet. A rainy afternoon, a quiet evening at home, or even just a desire to make a personal, heartfelt gift. Getting your hands dirty (or, well, your fingers slightly callused) with a bit of wire and some pliers is a truly satisfying way to spend an hour. It’s like magic—you start with a simple spool of metal, and before you know it, you've got something that looks like it was plucked right from a whimsical garden. This isn't just a craft; it's a way to slow down, be present, and create something genuinely beautiful. And the best part? These flowers never wilt.

Picking Your Perfect Petal Partner: Your Guide to Crafting Wire
Before we get our hands busy twisting and bending, let's chat about the star of the show: the wire itself. It might seem like a simple choice, but the type of wire you choose makes all the difference in the world. Think of it like a dancer choosing their shoes—the right fit makes the performance flow.
Most of the tutorials out there, including the one that caught my eye over at My 100 Year Old Home, swear by 20-gauge copper wire. Why? Because it’s the sweet spot. It’s thin enough to be incredibly pliable, so you won't need the grip of a superhero to shape it, but it's also sturdy enough to hold its form. You can usually find a roll of it at any craft store or on Amazon for a steal. The variety of colors available is wild, too, so you can make everything from classic red roses to funky, modern-looking iridescent flowers.
Then you have a whole other realm of possibilities with florist's wire or even crafting wire. If you want to make flowers with a more substantial, almost rustic look, you might go for a slightly thicker gauge. And if you're looking to create those stunning, ethereal blooms that look like they're made of stained glass, you'll need a specific kind of setup.
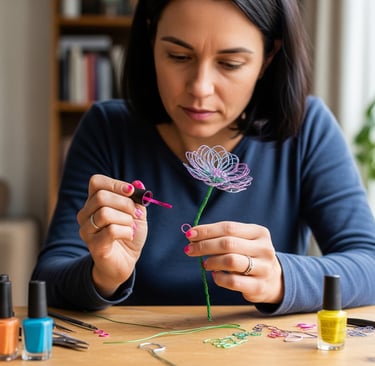
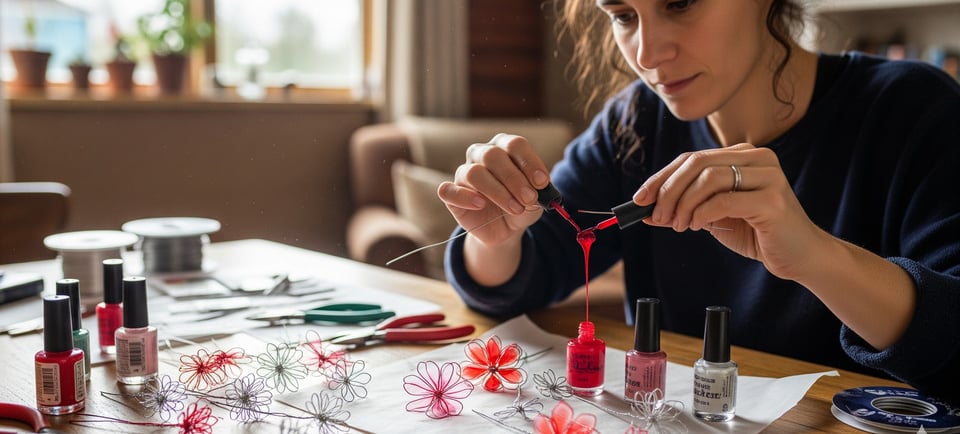
Making Wire Flowers: The Nail Polish Method
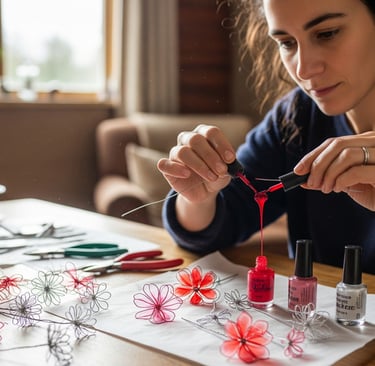
This is where things get truly mesmerizing. A lot of folks, including the clever writer at Chalking Up Success, have figured out a way to combine two seemingly unrelated things—nail polish and wire—to create breathtaking, almost jewel-like flowers. Here's the gist: you create your wire frame, and then you use the nail polish to fill in the space between the wires.
The key to this method? A steady hand and maybe an older, thicker bottle of nail polish that you haven't used in a while. The consistency is everything; it needs to be thick enough to form a delicate film across the open space of your wire petal. A little wood glue can even help the polish adhere if you're working with a wider petal frame. It’s like creating a tiny, miniature stained-glass window for each petal. The result is a vibrant, translucent flower that catches the light in the most beautiful way.
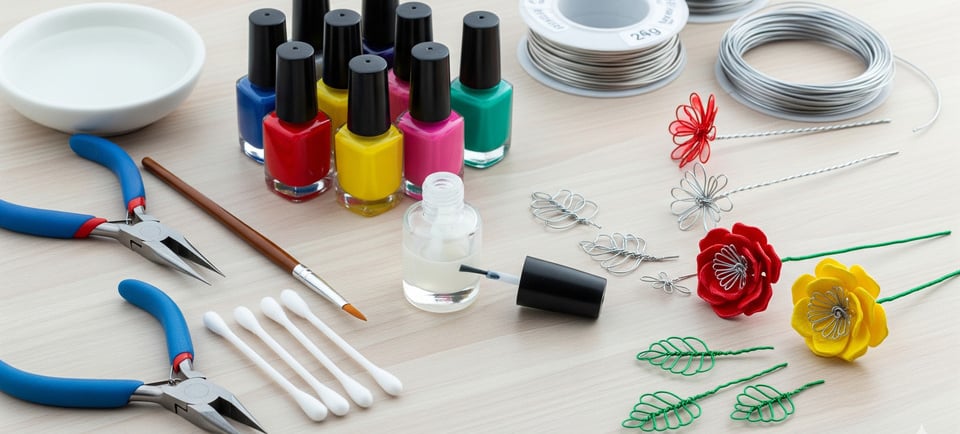
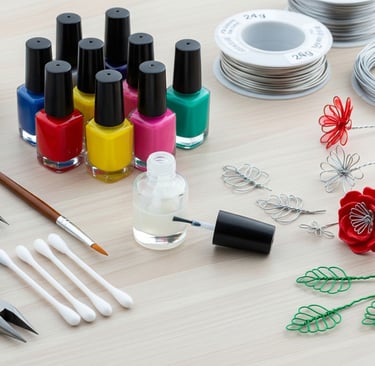
The Tools of the Trade: What You'll Need to Get Started
You might think you need a full-on workshop, but honestly, the tool list is blessedly short. It's a craft that's incredibly accessible, which I love.
Wire: We've already covered this, but a good spool of 20-gauge wire is your starting point. Copper is a great choice because of its warm, classic look.
Pliers: A small set of round nose pliers and wire cutters are your best friends. The round nose pliers are essential for getting those perfect circular or teardrop-shaped petals. The cutters are, well, for cutting the wire. It's a simple combo that gives you a surprising amount of control.
Nail Polish (Optional): If you're going for the nail polish method, grab a few colors you love.
Something to Shape Around: You'll need a cylindrical object to help you form the loops. A pen, a pencil, or even a small dowel rod will do the trick.


A Simple Step-by-Step Guide to Making Wire Flowers
Here's where the rubber meets the road. Or, I guess, where the wire meets the pliers. The general approach for making a basic wire flower is surprisingly intuitive.
Start with the Petals: Roll out a length of wire from your spool. Don't cut it yet! This helps you keep a continuous piece of wire for the entire flower. Using your pliers or a cylindrical object, create a loop. This is your first petal.
Twist and Shape: Twist the wire at the base of the petal to secure it. Then, repeat the process to create another loop. You'll want to bend the wire slightly at an angle to create room for the next petal. It might feel a bit clunky at first, but you'll find your rhythm.
Complete the Flower: Keep creating petals until you have your desired number, usually five or six. Once you have a full circle of petals, twist the wire together at the center to secure the form.
Create the Stem: Now, take that continuous piece of wire and bring it down to form the stem. You can twist the wire onto itself to make a sturdy stem that won't flop over.
Refine and Finish: This is the fun part. Gently adjust your petals with your fingers or pliers. You can make them more pointed, rounded, or give them a gentle curve for a more natural look.
What's really great is how much freedom you have here. You can make a single, elegant stem or a whole bunch for a small, unique bouquet. And don’t even get me started on the possibilities for different flowers! Sunflowers, roses, even whimsical wildflowers—the same basic technique applies. It's all about how you shape and arrange the petals.
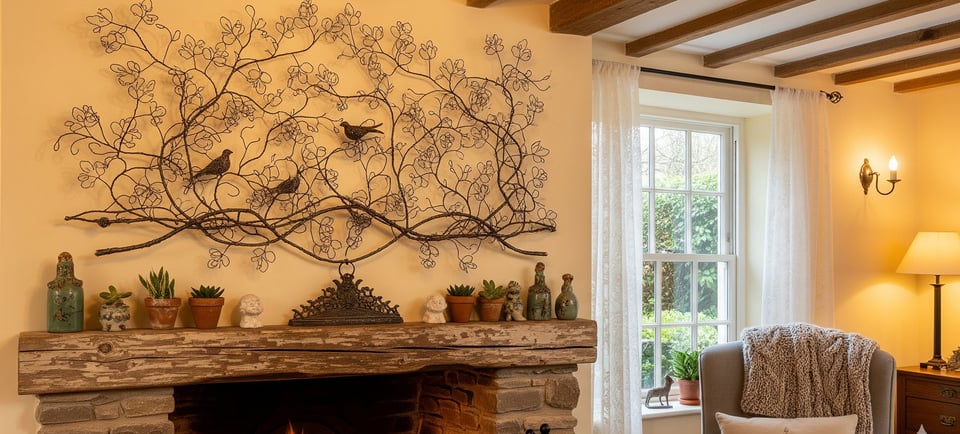
From Flowers to Forever: Displaying Your Wire Creations
So you've made these beautiful little creations. Now what? The possibilities for what you can do with a handmade wire bouquet are endless. You could pop them into a simple, minimalist vase for a touch of modern decor. They make a fantastic, personal addition to a gallery wall, or you can even turn them into unique jewelry pieces like pendants or earrings.
I've seen people use them to decorate gift wrapping, which adds such a special touch. It's so much more personal than a store-bought bow, isn't it? Or, and this is one of my favorite ideas, you could gather a whole bunch of them and create a stunning centerpiece that is completely unique to you. A simple vase, a handful of these flowers, and you’ve got something that’s not just a decoration but a conversation starter. People will be amazed that you made them yourself!


Making Wire Flowers FAQs
Q: What's the best type of wire for a beginner?
A: 20-gauge copper wire is an excellent choice. It's easy to work with and widely available. It’s also durable enough to hold its shape once you’ve finished your creation.
Q: Can I use wire to make other things besides flowers?
A: Absolutely! The same techniques can be used for a wide range of wire art. Think of whimsical butterflies, delicate leaves, or even more abstract sculptures. It's a great way to explore your creativity beyond the typical floral form.
Q: Do I need any special tools besides pliers?
A: Not necessarily. While there are a lot of specialized jewelry-making tools out there, you can get started with a pair of round-nose pliers, wire cutters, and something to help you shape your petals, like a pen or a small dowel. The beauty of this craft is its simplicity.
Q: How do you make the flowers with different colored petals?
A: This is where the nail polish method comes in! You can simply use different colors of nail polish on each petal or even apply a different shade to a different flower within your bouquet to create a vibrant, multi-colored look. The possibilities are truly as vast as the colors in a nail salon.