Oversized Paper Flowers : A DIY Guide for Stunning Floral Decor
Create show-stopping decorations that will never wilt with the magical art of crafting giant paper flowers. This surprisingly simple DIY project is a game-changer for weddings, parties, or home decor, offering a vibrant and long-lasting alternative to fresh blooms. Learn how to craft your own massive paper flowers and add a unique, handmade touch to any space.
9/13/20255 min read
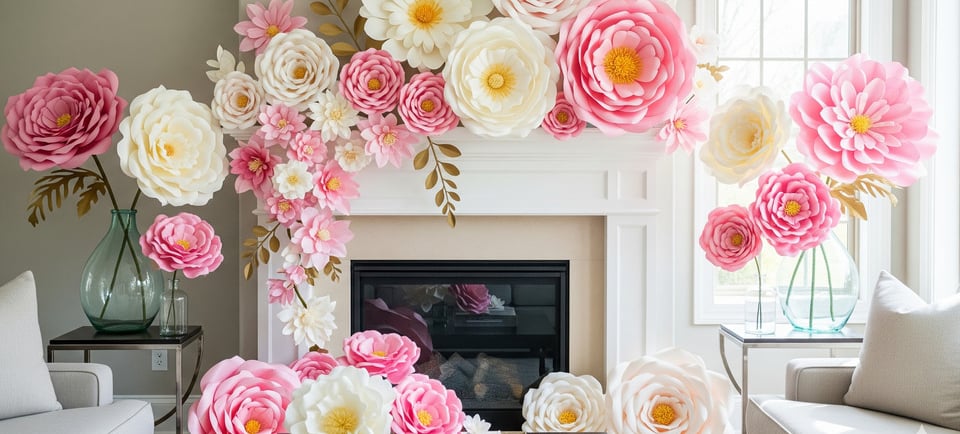
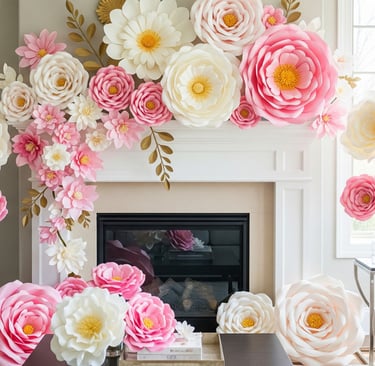
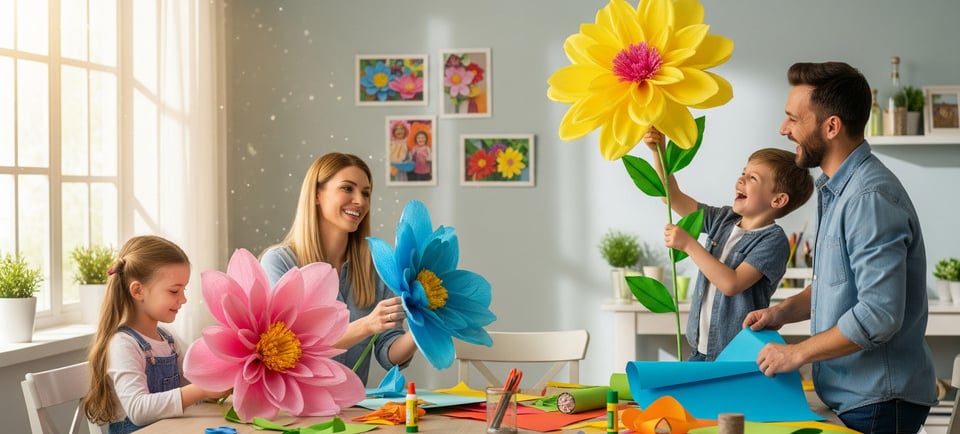
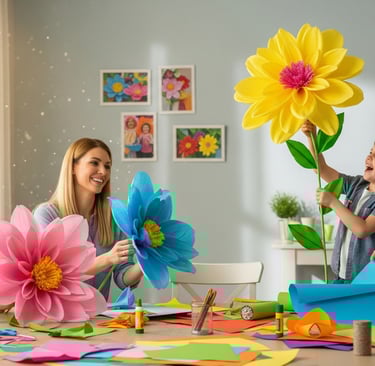
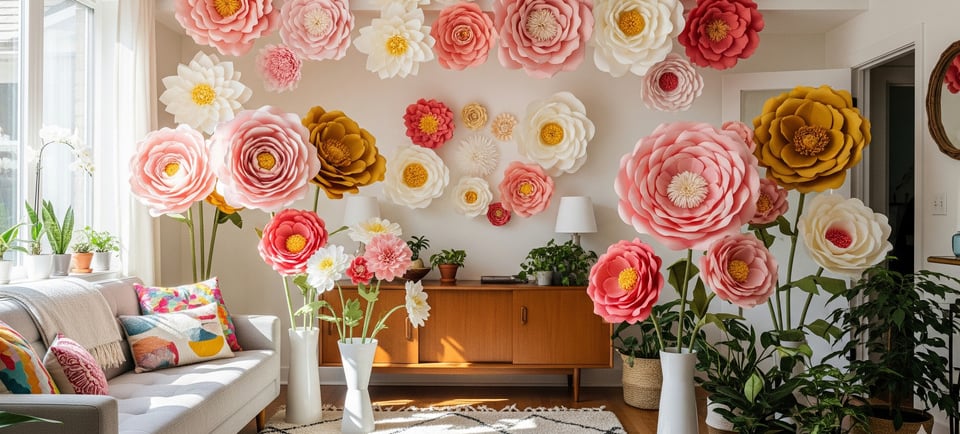
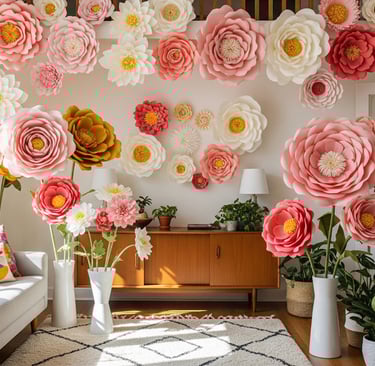
You know what? There's just something magical about a beautiful bouquet of flowers. They can brighten up any room, any day. But let's be honest, fresh-cut flowers fade, and for big, show-stopping events, a simple bouquet just doesn't cut it. That's where the absolutely enchanting world of giant paper flowers comes into play. They're a game-changer, I swear. Think about it: massive, vibrant blooms that never wilt, never need watering, and are surprisingly simple to craft. Whether you're planning a wedding, a birthday party, or just want to add a serious pop of color to your home, making your own huge paper flowers is an incredible way to go.
Now, you might be thinking, "Me? A crafter? With a glue gun and everything?" Honestly, it’s not as intimidating as it looks. The beauty of these projects is that they're incredibly forgiving. A slightly misshapen petal? Perfect! It just makes your DIY paper flowers look more natural and unique. We’re not aiming for machine-made perfection here; we’re going for that handmade, artisanal touch that feels truly special. And the best part is, you can truly make them your own. You'll be amazed at the personality you can pour into these oversized flowers.
Getting Started with Your Paper Floral Craft: The Essential Supplies
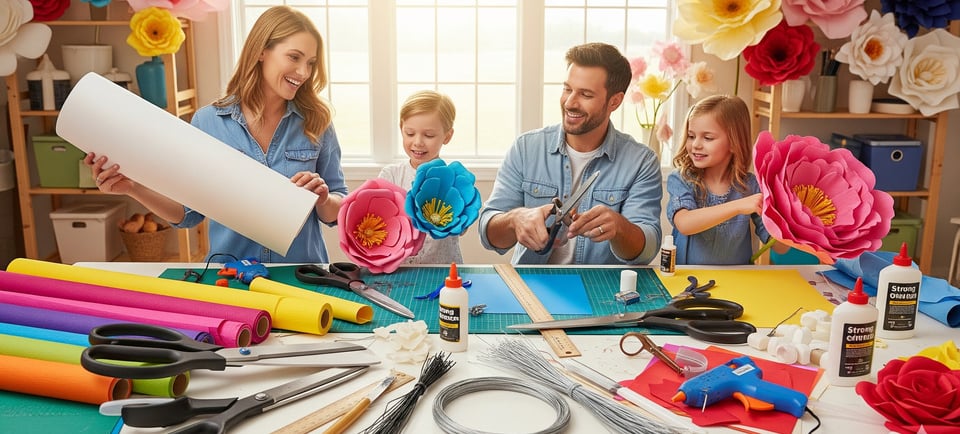
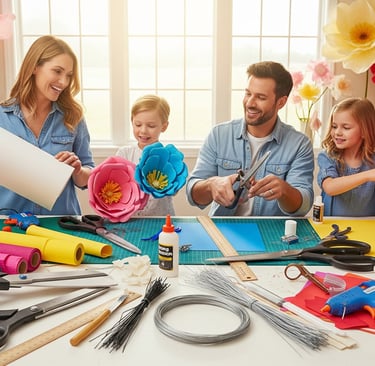
Before we get to the fun part—the actual creation—we need to talk tools. You don't need a crazy workshop or anything. A lot of these items you might even have lying around the house. When it comes to the paper, you’ve got options. For the really big, dynamic blooms, crepe paper is your best friend. Italian crepe paper, in particular, has this lovely stretch to it that lets you shape and cup the petals just so, making them look so much more realistic. Another popular choice, especially for the super structured paper floral craft, is a heavy cardstock. It holds its shape beautifully and is great for things like a classic rose or a dahlia.
Here’s a quick rundown of the gear you'll want to have on hand:
Paper: Crepe paper (Italian is a pro tip!) or sturdy cardstock in your favorite colors.
Hot Glue Gun: A low-temp one is great for beginners—it’s a little more forgiving if you get some glue on your fingers.
Scissors: Sharp ones, for sure. Precision is key, even with a freehand approach.
A Stem Base: For flowers meant to stand tall, a wooden dowel or a piece of PVC pipe is perfect.
Something to Secure It All: Masking tape works wonders for keeping everything in place before you add the paper stem cover.
The trick with these large paper flowers is working in layers. You start small, building from the inside out, and each new layer gives your floral piece more volume and life. The process is a bit like sculpting, really—you’re not just sticking things together, you’re creating shape and form with your hands.
Making Oversized Paper Flowers FAQs
Q: Can I use a cutting machine like a Cricut or Silhouette?
A: Absolutely! In fact, a lot of people use cutting machines to get precise petal shapes and sizes, which can be a huge time-saver. You can find tons of templates online that are designed for these machines. Honestly, it’s a brilliant way to ensure consistency, especially if you’re making a lot of paper blooms for a backdrop or an event.
Q: How do you make the flowers stand up?
A: For flowers that are part of a backdrop, you can attach them directly to a wall or a board with a command hook or a small wire loop. For freestanding paper floral decorations, you can use a PVC pipe as the stem. A clever trick is to set the pipe into a planter filled with quick-dry cement. It’s sturdy, reliable, and you can hide the planter with a pretty ribbon or some other decor.
Q: Are these crafts just for special occasions?
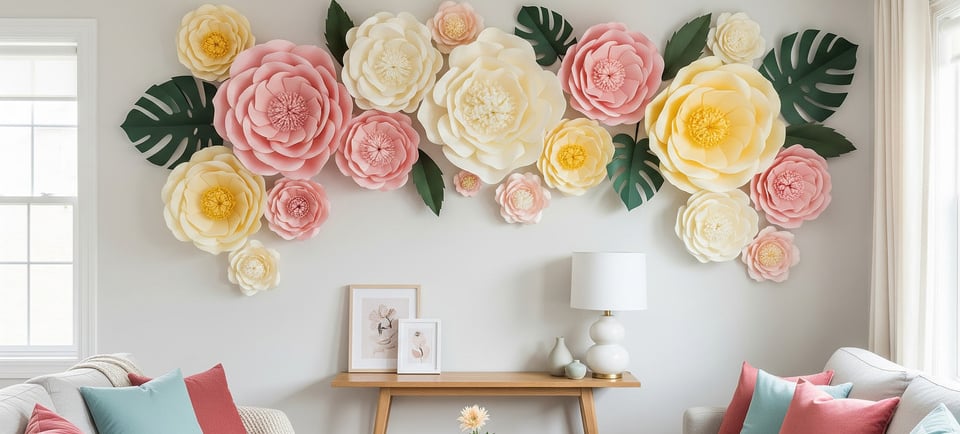
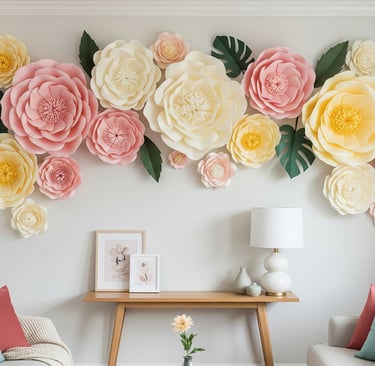
A: Not at all! While they're spectacular for weddings or parties, they make truly unique and breathtaking home decor. A single, dramatic oversized flower in a corner of your living room can become an incredible focal point. Think about tying in seasonal colors—bright sunflowers for summer, or soft, romantic shades for a chic nursery.
The Art of the Petal: Cutting, Shaping, and Pleating
This is where the magic really happens. Forget store-bought perfection; the secret to making these DIY paper flowers look like a living, breathing work of art is in the details. When you're cutting your petals, a freehand approach can be surprisingly beautiful. Try a sort of church-window shape for a classic rose or peony. Cut a few different sizes, from small to extra-large, and don’t worry if they aren’t all identical. That's the point!
Once you have your petals, it’s all about shaping them. Gently stretch the top of each petal to give it a convex curve, and then stretch the middle to create a subtle concave dip. This is what gives your paper blooms that natural, fluid shape. For the larger petals, you'll need to create a small pleat or two at the base before you glue them. This simple technique allows the paper to cup and form a fuller, more open shape at the top while keeping the base tight and secure. It's a bit like arranging a skirt with little gathers—a small detail that makes a world of difference.
Building the Stem and Calyx: The Final Touches
Every great flower needs a great support system. For our handmade flowers, the stem is just as important as the bloom itself. After you've built up your flower head, you'll want to secure the base. A bit of masking tape wrapped tightly around the bottom of the petals is a great way to do this.
Next, you get to cover it up with a lovely, decorative stem. Cut a long, diagonal ribbon of your stem-colored paper. Using a little hot glue at the starting point, wrap the paper ribbon tautly around the dowel or pipe, overlapping as you go. This gives the stem a really professional, finished look. The final piece is the calyx—that small, pointed leafy part at the base of a real flower. You can cut a star-like shape from the same green paper, slide it up the stem, and glue the points to the base of your petals. This simple touch makes the entire paper floral craft feel complete and polished.
Honestly, the feeling you get when you’ve finished one of these is just fantastic. You start with a few simple sheets of paper and a little glue, and what you get is a magnificent, permanent sculpture of a flower. It's a wonderful little contradiction—a craft that's both temporary in its materials and everlasting in its beauty. So, grab your paper and your glue gun, put on some good music, and let's get crafting. Trust me, you'll be so glad you did.